
Create, edit and post news letters

In this documentation you will find information about creating, editing and posting news letters and mail documents to individuals or user groups that have opted-in for a mailing list.
Creating a new news letter or mail document
There are two ways to create a new mail document.
Create mail document (option A)
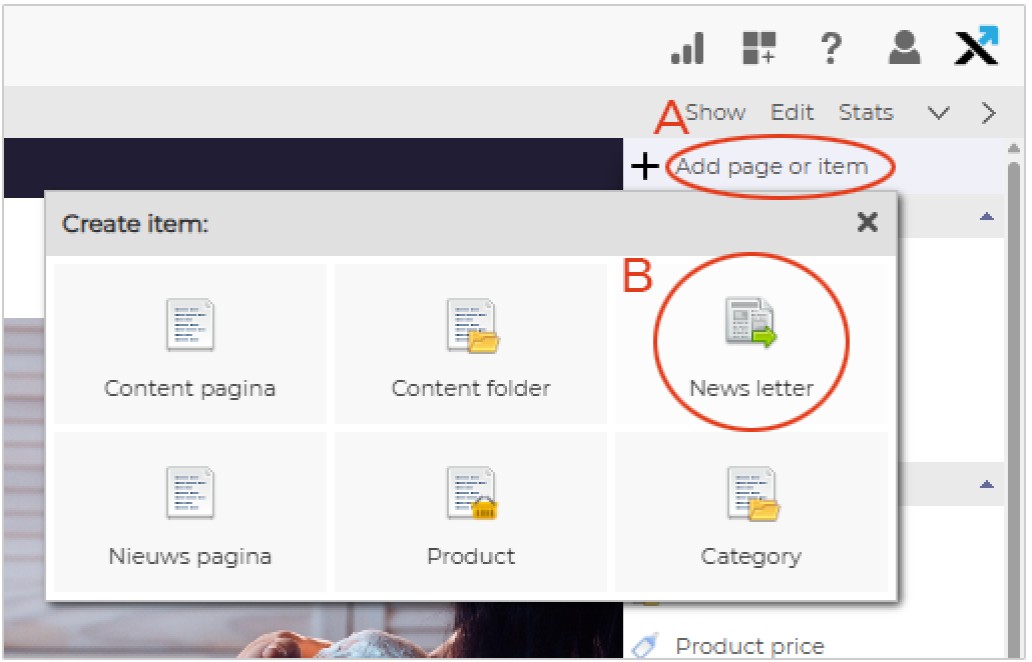
Within the backend, select the "Add page or item" (See image A) on the top right of the backend screen, a window with page elements is presented. Select the "News letter" option in the window (See image: B). You can also create a new news-letter within the Mailing documents administration module (described later in this document).
After you click on the "News letter" option a new news letter is created and the settings window is opened:
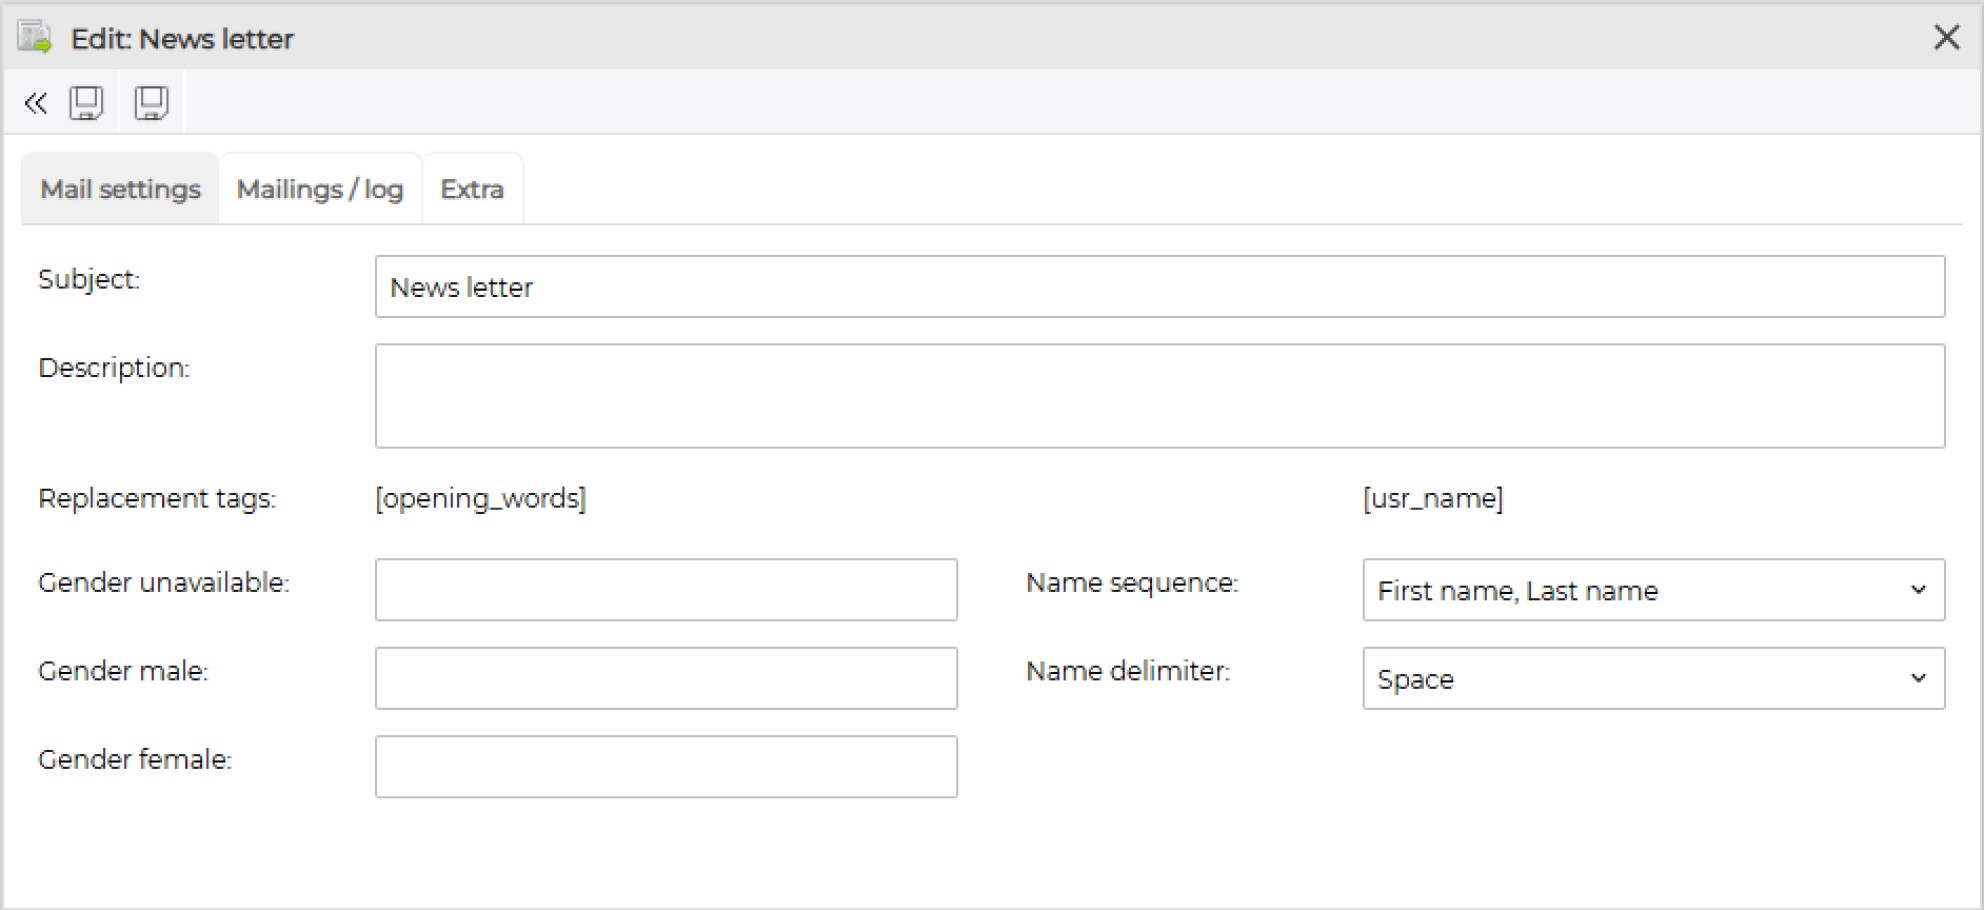
| Subject | This is the subject of the mail document. |
| Description | A meta description (not shown to the receiver) |
| Replacement tags | Tags that you can use in the mail document |
| Gender unavailable | Tag that is replace when the receiver gender is unknow, use for example |
| Gender male | Tag used when the receiver gender is male, for example |
| Gender female | Tag used when the receiver gender is female, for example |
| Name sequence | The sequence of the receivers name (Last, First name) |
| Name delimiter | The used naming delimiter |
Setup the desired mail "Subject" that is presented to the email receiver. You can use the replacement tags like [opening_words] and [usr_name].
Setup the gender replacement tags and naming presentation settings (name sequence and name delimiter).
Then click on the "Save" button to store the settings.
Setup and edit the mail document
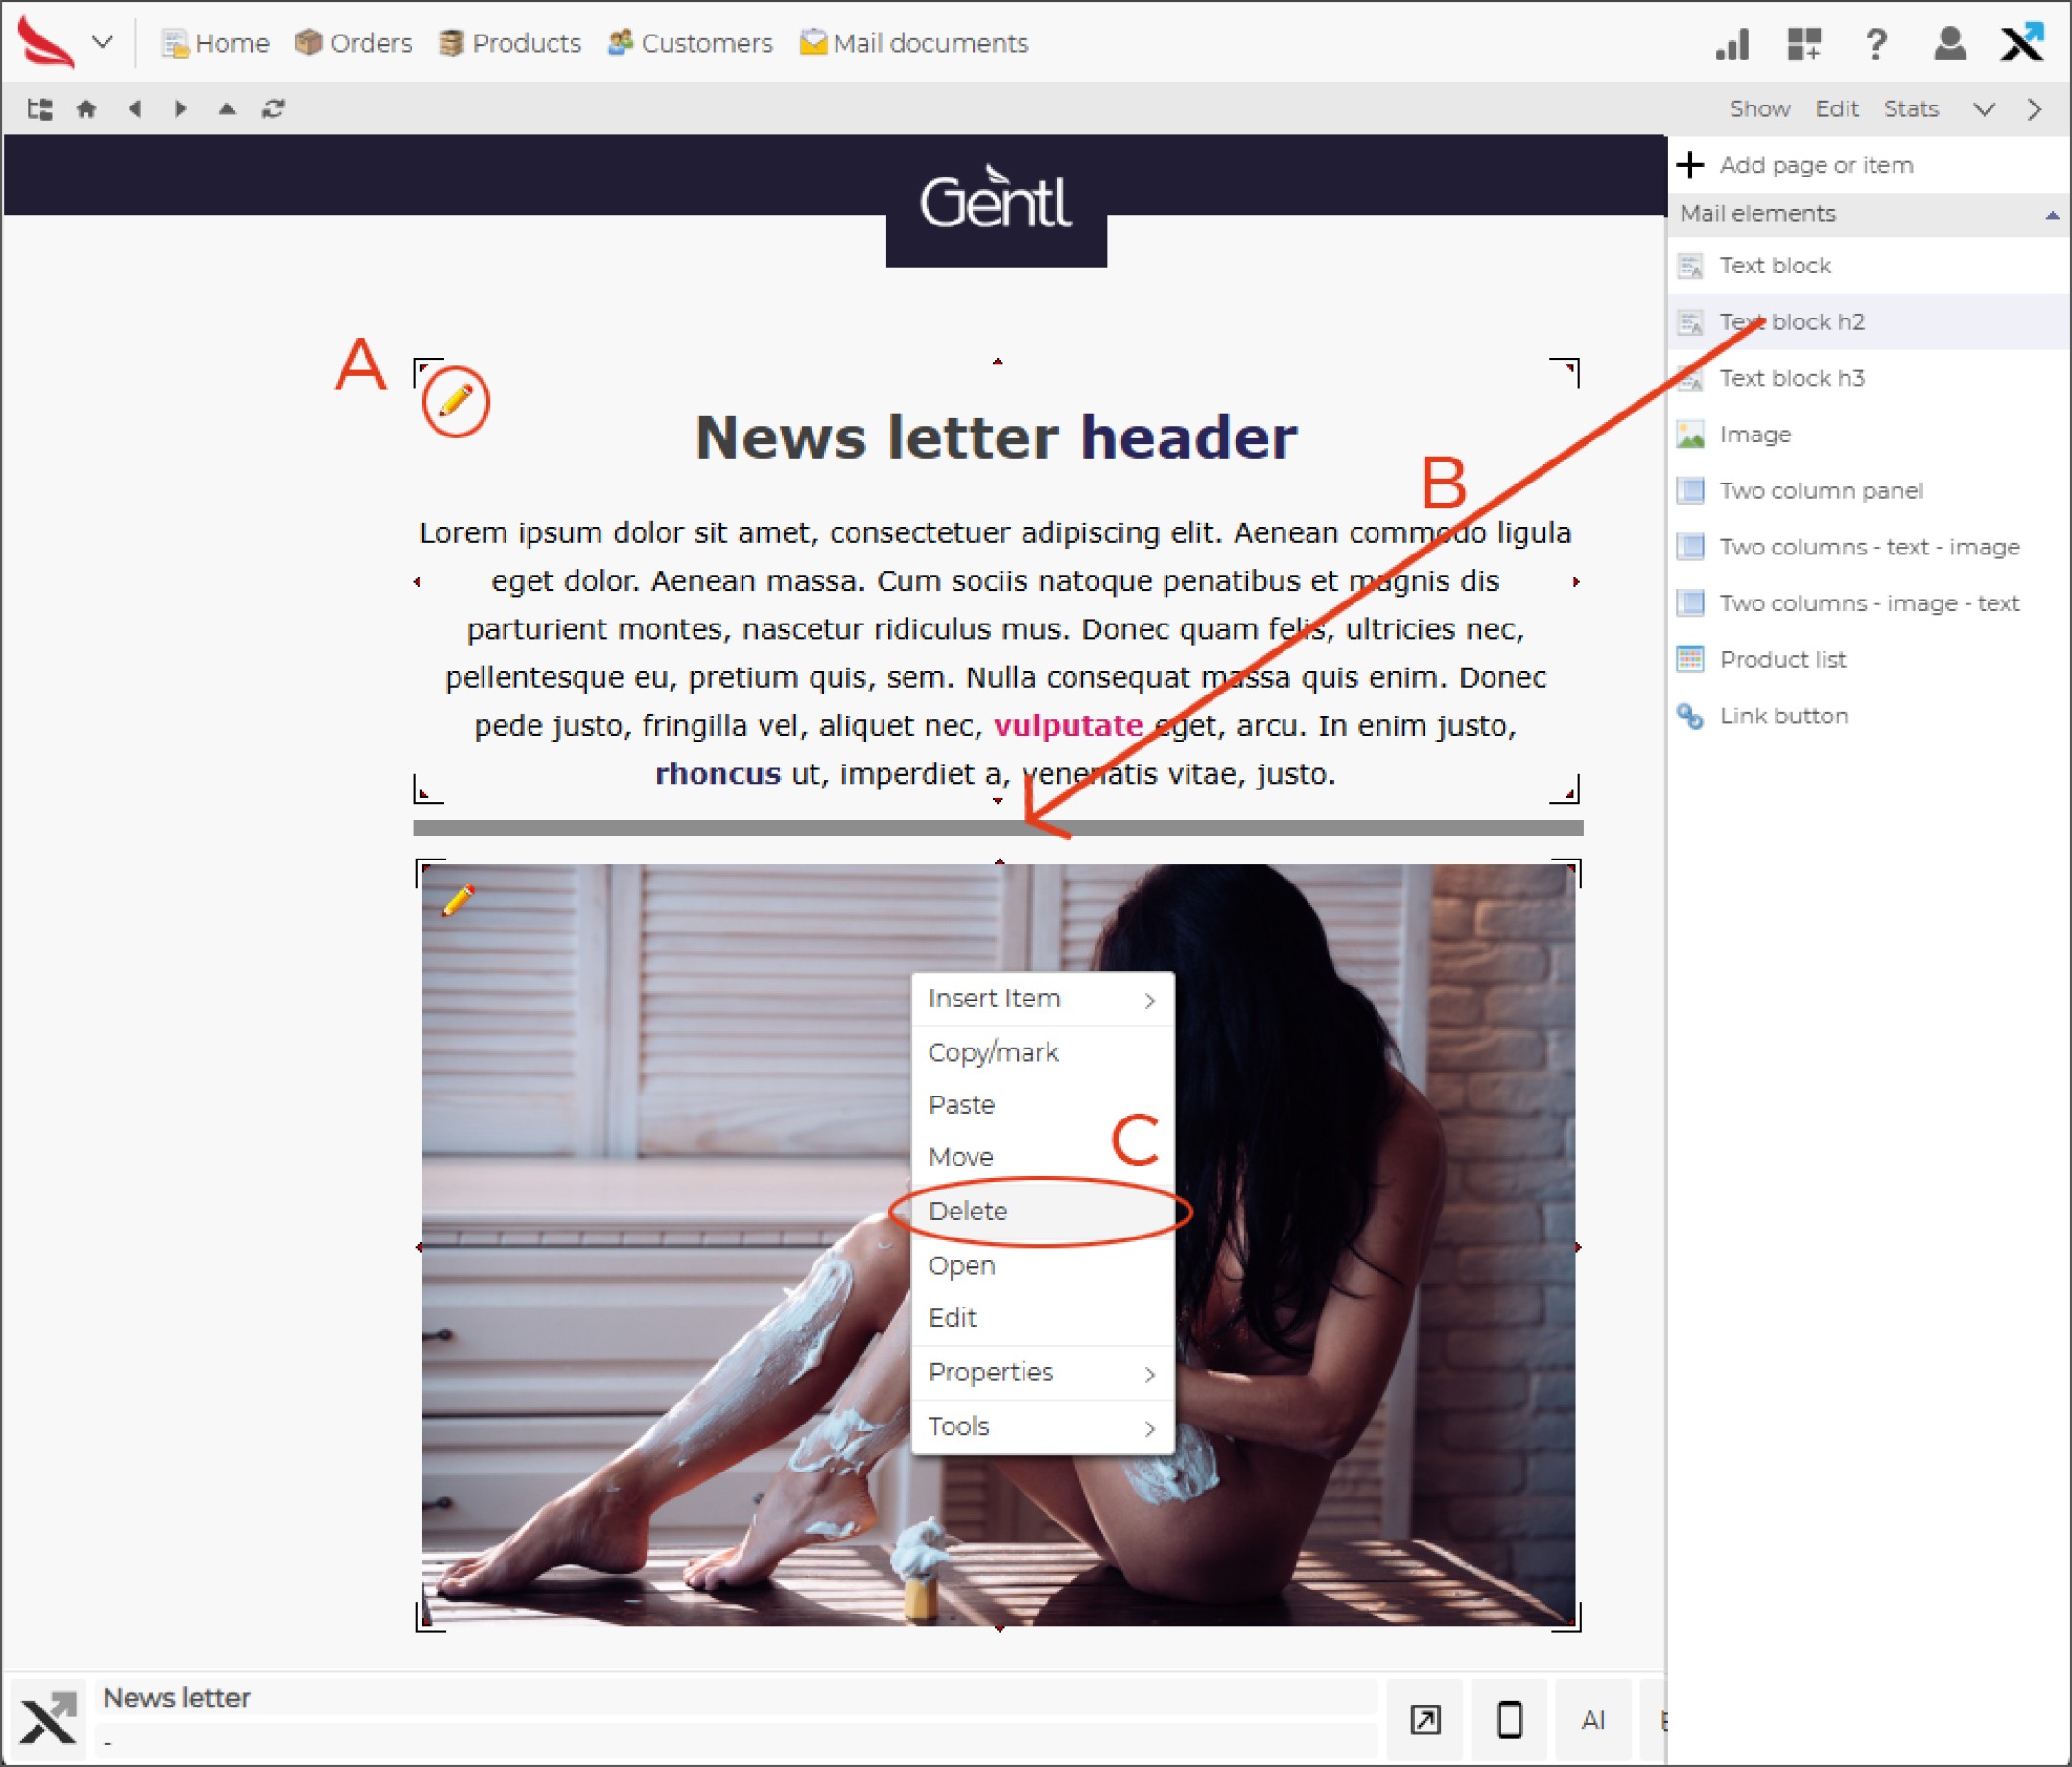
After the mail document settings are saved the (default) new mail document is presented, edit it as any other (Xsdot) page.
Click on the edit icons within the mail document sections (A) or drag & drop new elements like texts or images into the document (B).
You can delete elements by selecting the section, click on the right mouse button and select the delete option (C) within the menu.
Posting the mail document to a person or user group
Advice: always post the document first to yourself or a test group to test if the document is received as desired, the replacement tags are working as expected and all links within the document are working before sending it to a group!!
Within the mail document editor you will find the "Post document" button on the bottom right of the mail document page (A).

Click on the "Post document" button, a window with 3 tabs / post options is presented.
Tab 1: Group
Post the document to a user group. Fill in all the desired settings and select the "Create mailing" option to create the mail process and start posting the news letter to the selected user group(s).
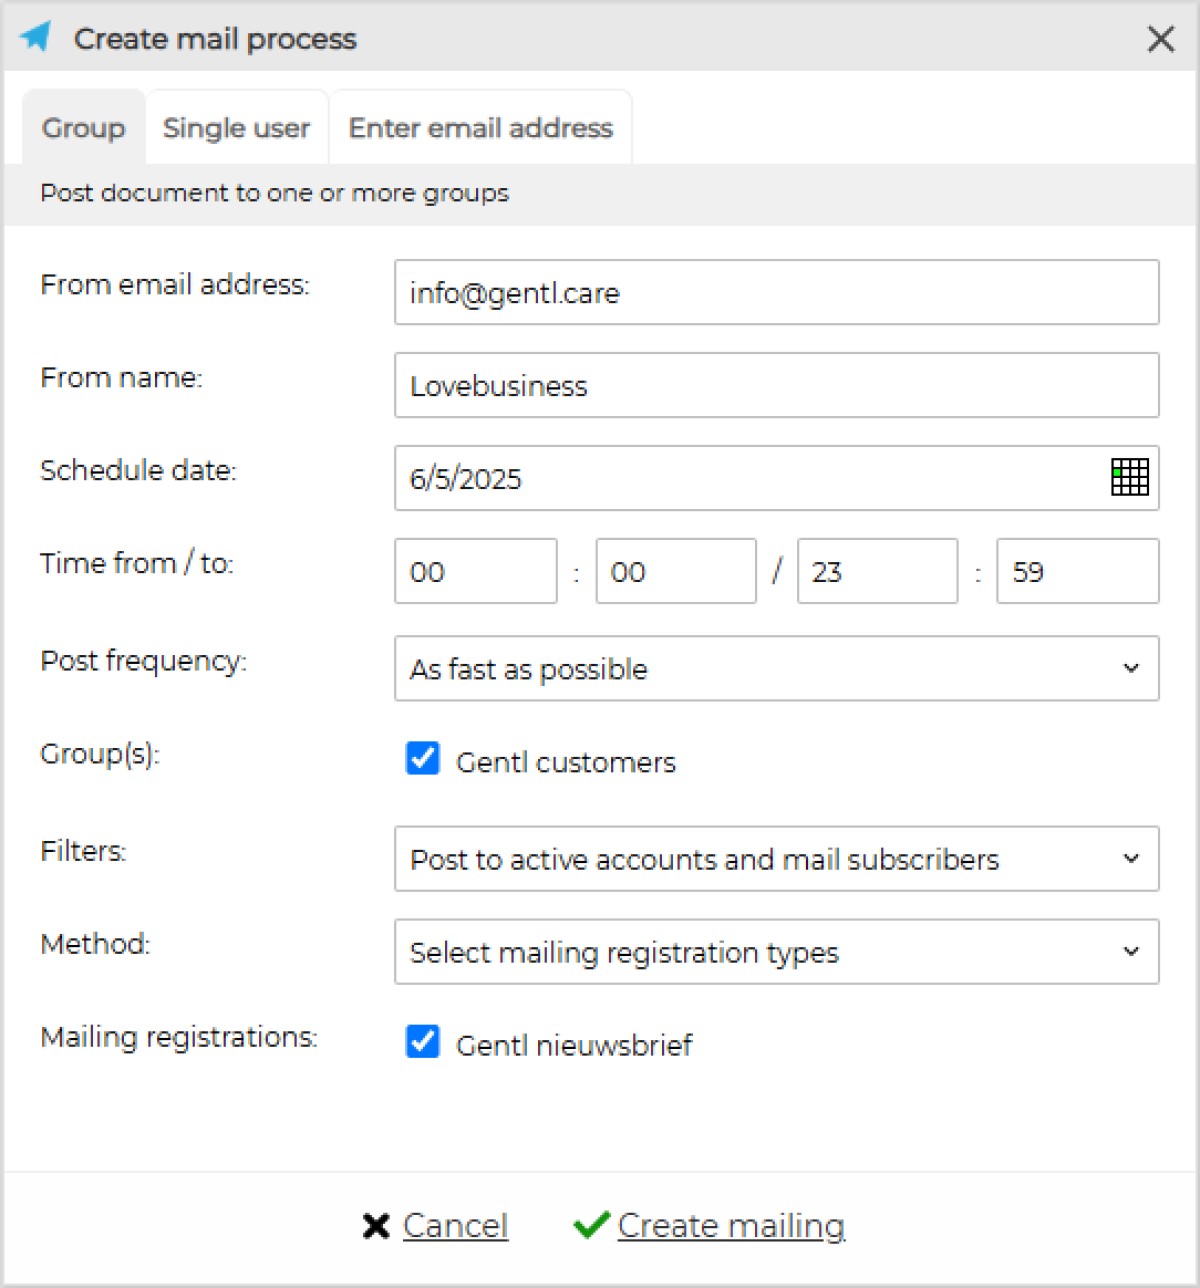
| From email address | The from email address of the email. |
| From name | The from name of the email |
| Schedult date | The desired mail post date (default is emeditate / today) |
| Time from / to | The sending from and to time (e.g. post the mailing withing office hours) |
| Post frequency | The email posting speed / frequency. (slower gives a lower change for spam reports) |
| Group(s) | Select the groups that you wnat to post the mailing to |
| Filters | Select active accounts only or all users |
| Method | Specifies to post the mailing to opted-in users or all users |
| Mailing registration(s) | Select the opt-in mailing registration types |
Tab 2: Single user
Post the document to a single user. Fill in all the desired settings, select the user (by clicking on the search sign or fill in the user id). Select the "Create mailing" button to start posting the news letter to the selected user.
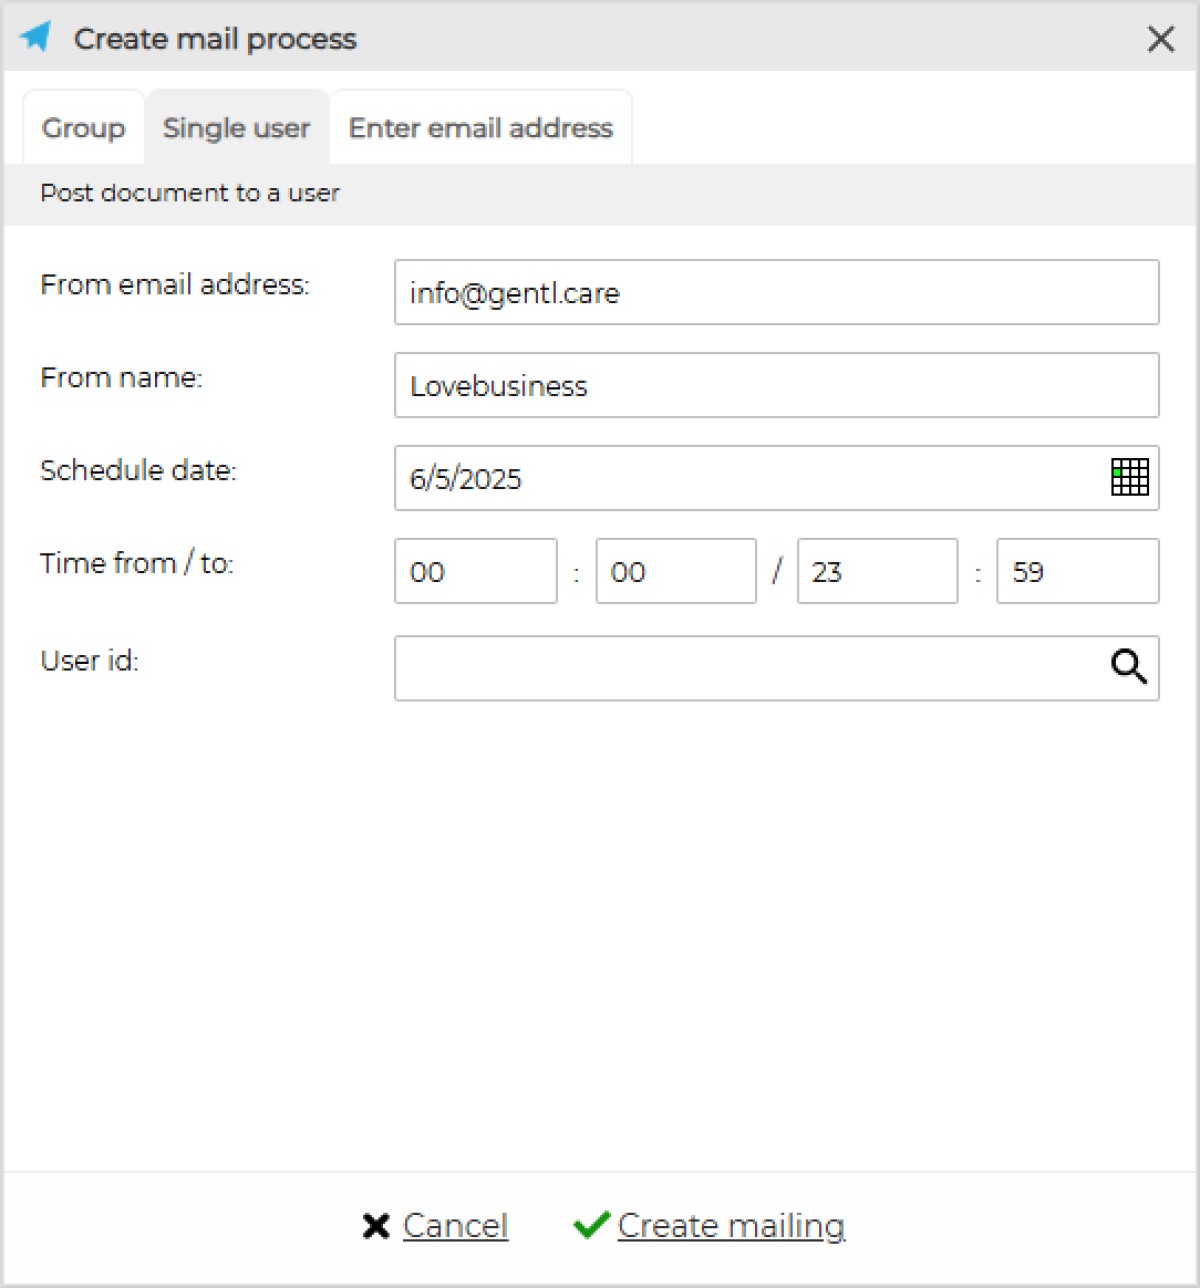
| From email address | The from email address of the email. |
| From name | The from name of the email |
| Schedult date | The desired mail post date (default is emeditate / today) |
| Time from / to | The sending from and to time (e.g. post the mailing withing office hours) |
| User id | The id of the receiving user (select the search icon to find and select the receiving user) |
Tab 3: Enter email address
Post the document to an email address. Fill in all the desired settings and select the "Create mailing" button to start posting the news letter to the entered email address.
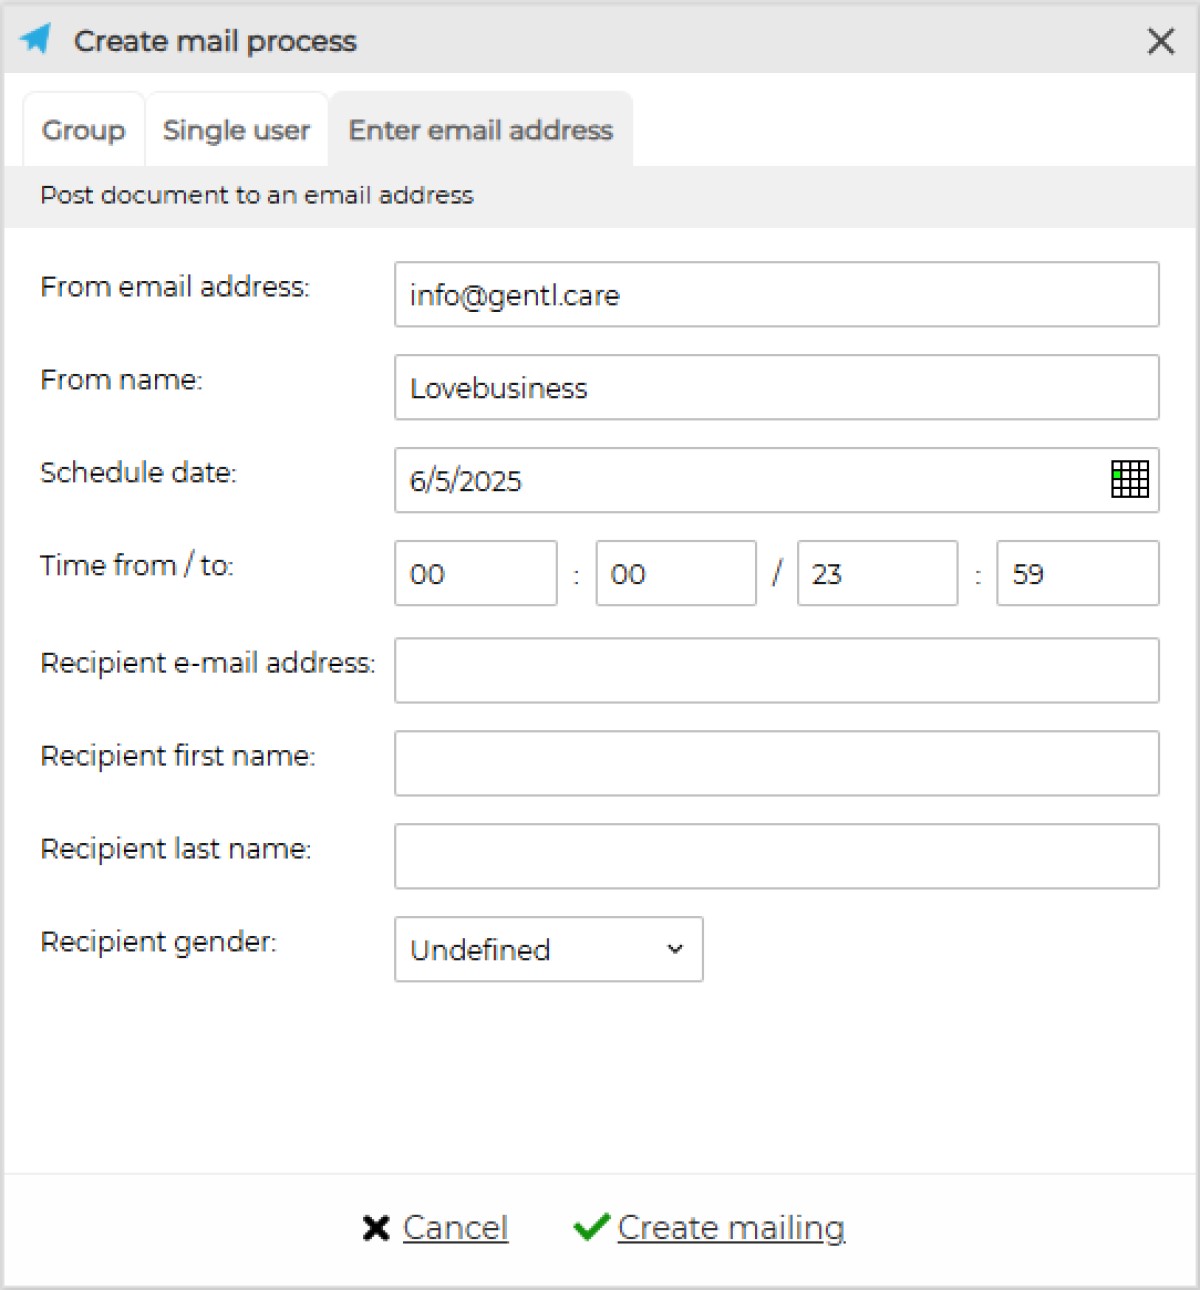
| From email address | The from email address of the email. |
| From name | The from name of the email |
| Schedult date | The desired mail post date (default is emeditate / today) |
| Time from / to | The sending from and to time (e.g. post the mailing withing office hours) |
| Recipient e-mail address | The email address of news-letter receiver |
| Recipient first name | The first name of the news-letter receiver |
| Recipient last name | The last name of the news-letter receiver |
| Recipient gender | The gender of the news-letter receiver |
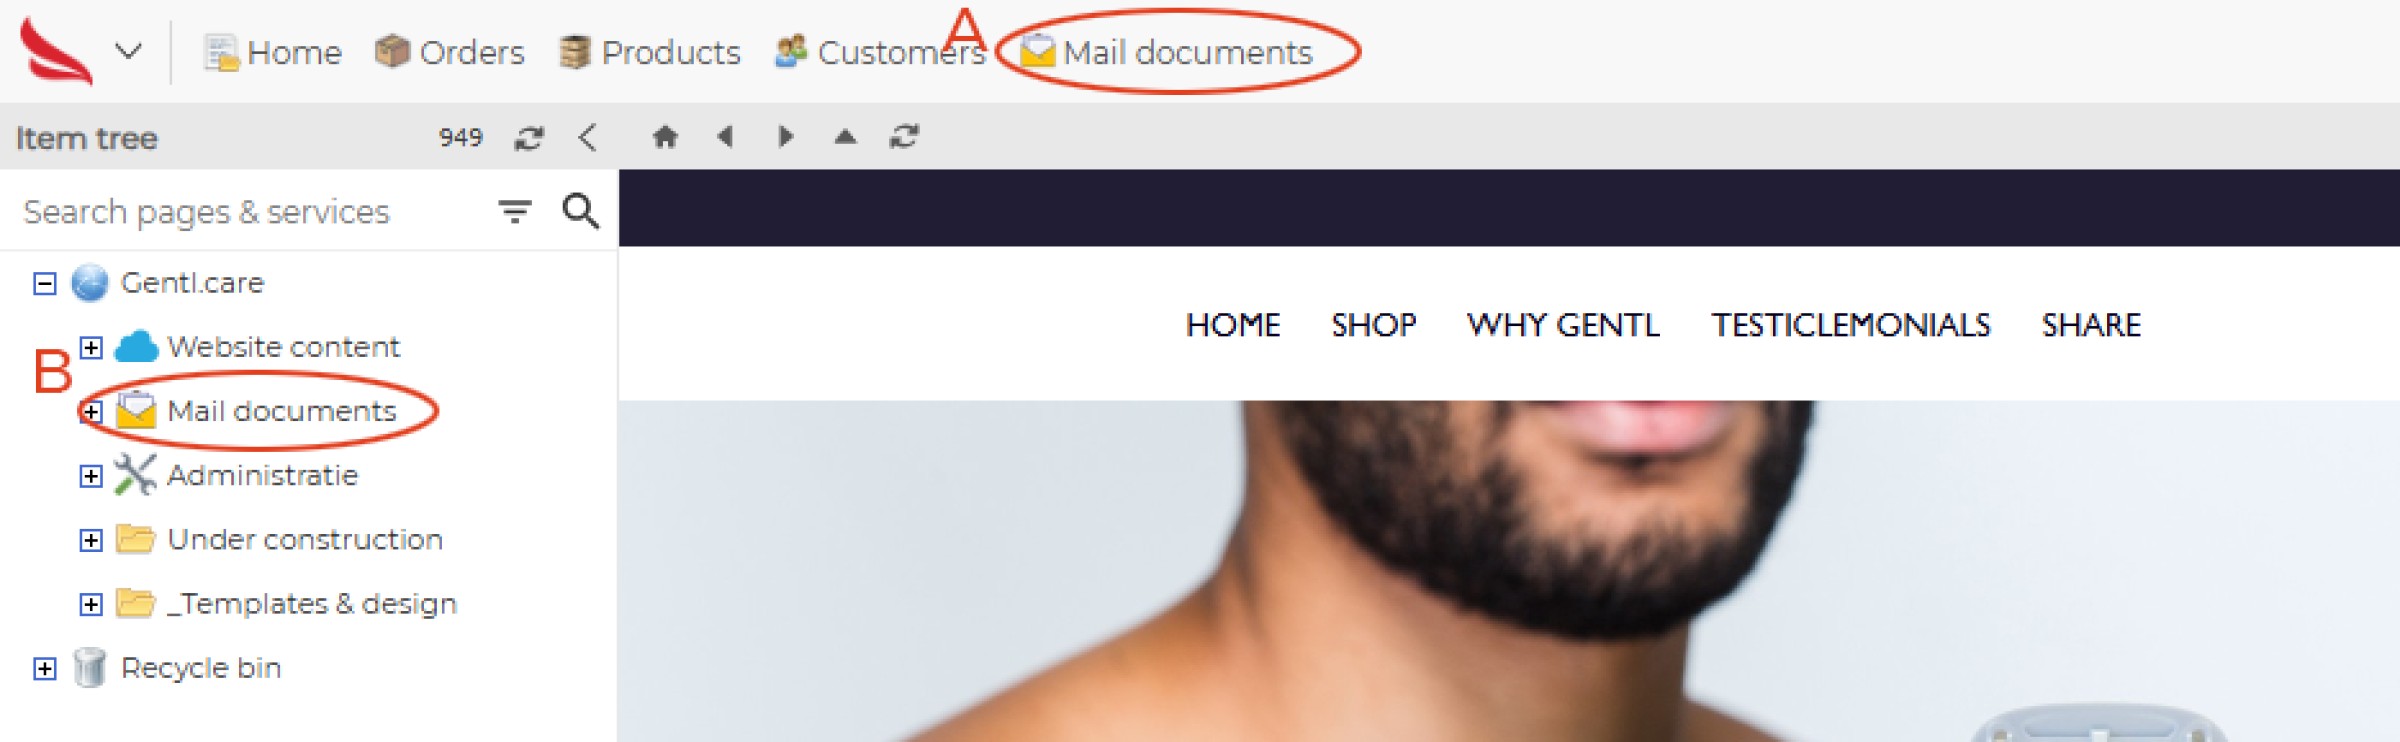
Mailing document administration module
Within this module all mail documents are listed. Each document can be edited, deleted, displayed, posted and monitored/tracked (mailing statistics). You can access the mailing administration module by clicking on the "Mail documents" button in the favorites bar (A) or the "Mail documents" item within the "items tree" (B).
After clicking on one of the "Mail documents" buttons the following administration tool is presented:

| A - Add / create | Create a new mail document |
| B - Settings | Click on the tittle to access the mail document settings |
| C - Display | Display the mail document |
| D - Post | Post mail document / create new mail process |
| E - Settings | Edit the mail document settings |
| F - Delete | Delete mail document, it will be placed into the recycle bin. |
| Emails | Total number emails to post |
| Sent | Currently total posted emails |
| Failed | Failed emails, due to for example errors, wrong email addresses, etc. |
| Spam | Number of emails marked as spam by its receivers |
| Bounced | Number of emails that have been bounced |
| Opt-out | Number of receivers that opted-out from the mailing list |
| Opened | Number of receivers that opened a link within the mail document or have viewed the news-letter (tracked by image) |
| State | The status of the mail process (Idle, sending, paused, finished) |
When you right click on a mail document row a menu is presented:

| Create mailing | Start posting the document to a user or group |
| Open document | Open the document for editing its contents |
| Display document | Displays the document |
| Edit document | Edit the document settings (e.g. subject and replacement tags) |
| Delete document | Moves the document to the recycle bin. |
Mailing process log
For every mailing document a mailing process log is available for each created mailing process. You can access it by selecting the edit options within a mailing document row and then the "Mailings / log" tab.
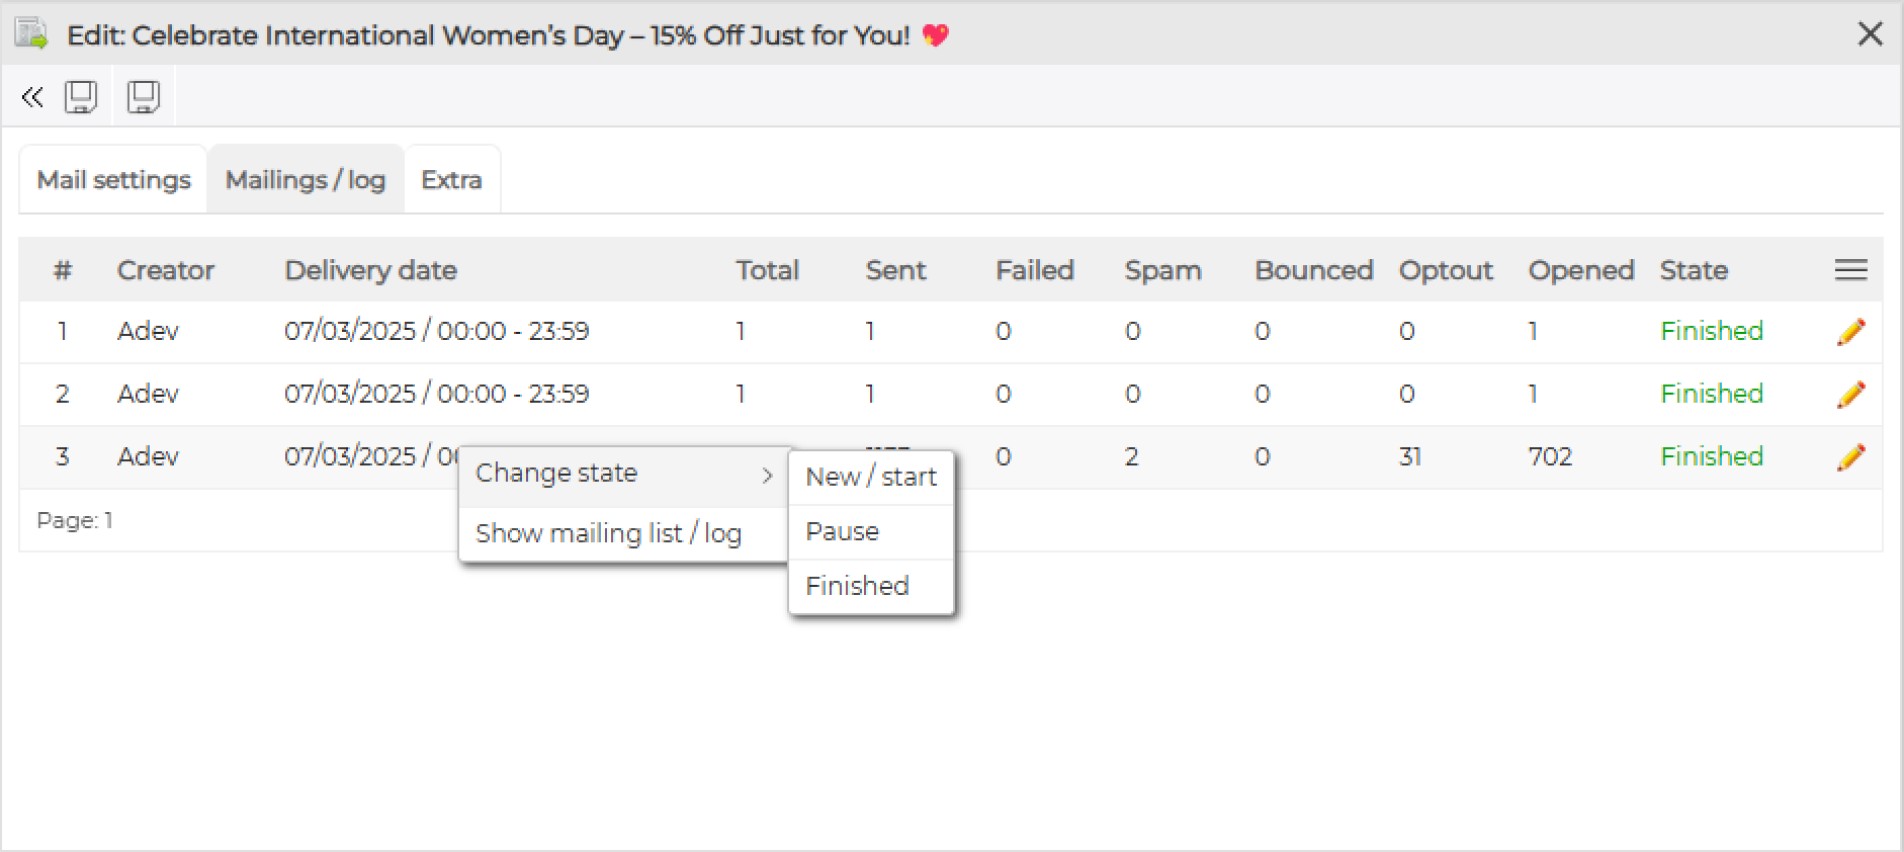
| Creator | The creator of the mailing process |
| Delivery date | Date and time when the mailing process was started |
| Total | Total number of emails to post |
| Sent | Total emails posted |
| Failed | Total number of failed emails |
| Spam | Total number of emails marked as spam by its receiver |
| Bounced | Total number of bounced emails |
| Optout | Total amount of opted-out users from the mailing list |
| State | The process state of the mailing (Idle, running, paused, finished)) |
| Edit button | Lists all emails separately / total log of emails |
| Change state: New / start | Restart the mailing postinh process |
| Change state: Pause | Pause the mailing sending process |
| Change state: Finished | Ends / finishes the mailing sending process |
| Show mailing list / log | Displays the complete mailing email list |